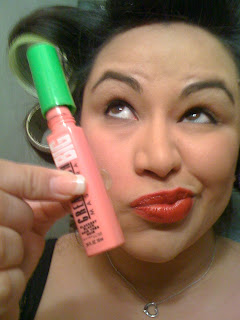
So I thought I'd do a tutorial where I show you how I wear my red lips with pride! :D
So red lips are tricky. A red that looks good on me...may not look good on you and vice versa. You need to try many a red to find the one that is right for you. You may even have to mix and match a few to find the right one. But red lips are classic.
Since red lips are pretty BAM in your face all on their own...it's important that you go neutral with the rest of the stuff on your face. You don't want to look like a clown.
Here is how I rock the red:
I was going out after this so I had my dry hair up in some velcro rollers. In the time it took for me to take all the pics my hair did itself. :D Anyways...start with a naked face (lies I have my foundation on.)
For a lasting effect I add cream blush to my face first (Here I used uncommon by MAC)
Then I add a neutral blush in the hallow of my cheek.
(Tenderling by MAC) *Tenderling is my MOST FAVORITE blush (can you tell by how little I have left?). Just about anyone can rock tenderling.
Then, because I wanted a little pin-up vibe, I added a brighter pick to just the apples of my cheeks (Pink Swoon MAC) Then I blended it all with my 187 brush...and didn't take a picture of the blending action. :(
My eyebrows suck...so I have to shape them thin...then draw them in where there are gaps. First I brush them all in the same direction, then I use a light brown shadow that is lighter than my hair color.
Then I use an angled brush to fill in my gaps. I used the MAC 266 brush. It was the first brush I ever bought at MAC. Best investment eva.
Here I colored in just the left one so you can see the difference.
*****I wasn't going to do a whole face tut so I jumped around...then decided to go for it so sorry that I did my lips first...and my eyeliner before shadow. Yeah I suck. For the record my lipstick is ALWAYS last. I put on some chapstick before I start so that my lips are well hydrated by the time I add color.*****
On to the ojos (eyes) *free spanish lesson for the day.
So I lined my eyes using BlackTracks Fluid Line by MAC...I used a flat brush this time but usually I use a small angle brush...I think it's the 262.
****Another note....I use about 90% MAC stuff. I get a discount for being a make-up artist so it is usually cheaper then anything else*****
I start in the corner (and pull my eye lid a little to make it easier to apply) don't try to make one continuous line when you are first learning. It won't ever be straight. I suggest using the flat brush, laying it directly on top of your lashes and just touching it to your lid. Then move over a bit and repeat all the way across your eye lid staying close to your lash line.
I then line right along my bottom lashes to about the middle of my eye. not too heavy.
I use my smudge brush to well...smudge the line a little. So it doesn't look too harsh. Remember I want my LIPS to be the focal point.
All smudged. I think...my pictures confuse me. I think there are a few I forgot to take along the way. SORRY!!
Time to Curl the lashes. There are so many tricks out there. I keep it simple and just curl them. Place the curler as close to the lash line as possible and do a test squeeze. If you don't have skin pinched in there squeeze hard and hold for about 10 seconds.
Here I jumped to lips....don't ask me why.
With your lip pencil ( I used Brick by MAC), start at the middle of your top lip and work out. PLEASE stay within your natural lip line. DON'T try and make your lips look bigger...you'll just look dumb and I'll make fun of you. Sad but true.
Because red tends to "bleed" (gets in all the lines and smears itself) you need to line your entire lip with the pencil. Color it all in like it is lipstick and not lip liner.
Then add your favorite red lippie. I used Racy by MAC. Again start at the middle on top, then do your bottom lip....again be careful to stay in the lines.
I think added a little Dazzleglass to give it a little more pop.
I used to go Matte all the time. Now I use gloss 98% of the time. I love me some gloss.
Here is when I realized I skipped Mascara cause I was soooo excited about my red lips.
Add a coat to each eye....then go back and add one more coat to each. Lightly coat the bottom lashes. Don't go crazy. You DON'T want spider eyes!!
Then I decided to add a little neutral shadow...
I used Bisque (MAC) I love Bisque. It's my go to for neutral.
I applied it from the brow bone down to a little below my crease.
Then cause it was there....I added a little golden cream shadow on my lid to my crease. I borrowed this from my oldest daughter....I was showing her how to apply it so I threw it in my tutorial. :D
The camera really washes out the colors. Just trust that it was there. :D
That was it for the face. Woohoo!! I did some pics for the hair....I'll work on that tomorrow I'm DONE! :D
I took a roller out to show you how it looks. I love my rollers.
Here I am....ready for my Flix with the Chix night!
Hope you enjoyed my first tutorial. What did you think? Next time I'll do a smokey eye. Browns? Plums? What do you wanna see?
Oh and I have a taco tutorial too!! :D
p.s. Once again I didn't proof read this post. Get used to it! :)
p.p.s Can someone make me a cool button? Pretty Please?? With sugar on the bottom and a cherry on top? I'll pay you in hugs. I'm a hugger!


